This Worthsaprk teaches you how to repair a faulty flash drive. For software or driver issues, you can scan and repair the flash drive using your computer’s built-in repair utility. If your drive doesn’t work due to improper formatting or data corruption, you can reformat your drive, but keep in mind that reformatting your USB flash drive will erase all files on it. Finally, if the flash drive doesn’t work due to physical damage, you should take it to a tech department or a data recovery professional; if that’s not possible, you can do it yourself by soldering the damaged USB drive’s circuitry to a working USB cable repair. However, it is not recommended that you attempt to repair it yourself as the risk of damaging the flash drive is high.
1. Insert the flash drive into the computer. The flash drive should fit into one of the rectangular ports on the PC case. If your flash drive experiences errors or fails to display its contents, you may need to update its drivers or software using your computer’s repair function.
2. Press ⊞ Win+E to open the File Explorer The picture title is File_Explorer_Icon.png. This will open File Explorer on Windows. You can use File Explorer to navigate to your flash drive.
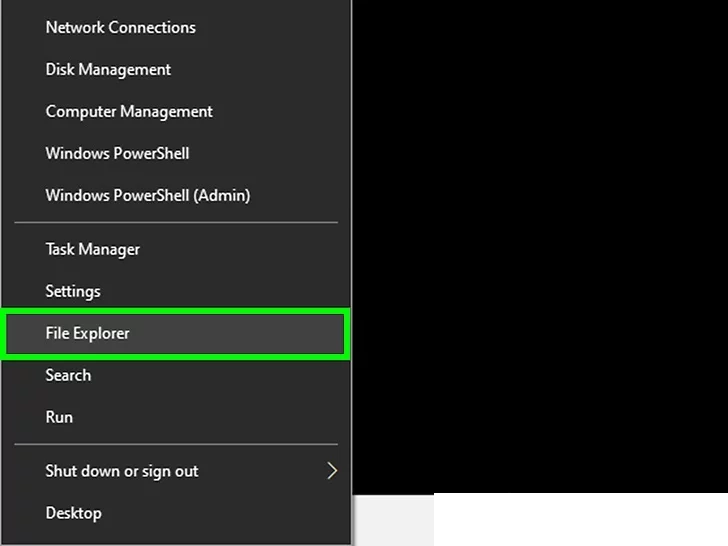
3. Right-click the icon of the flash drive. This will bring up a menu to the right of the drive.
You may need to click > next to This PC first to view the flash drive.
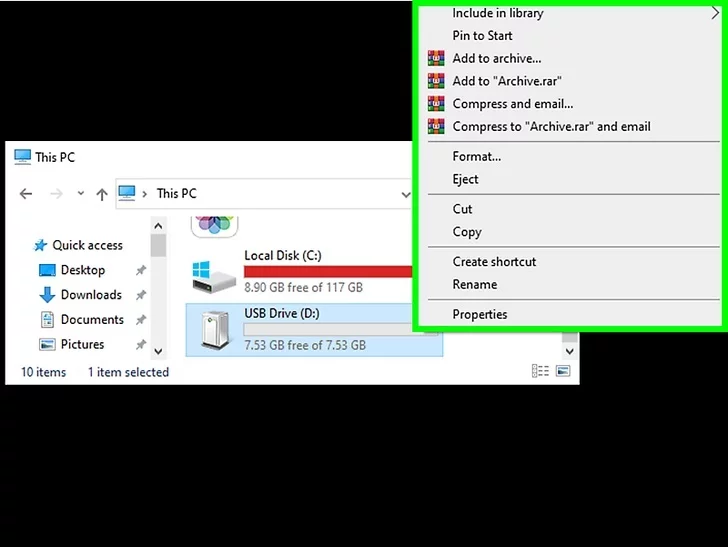
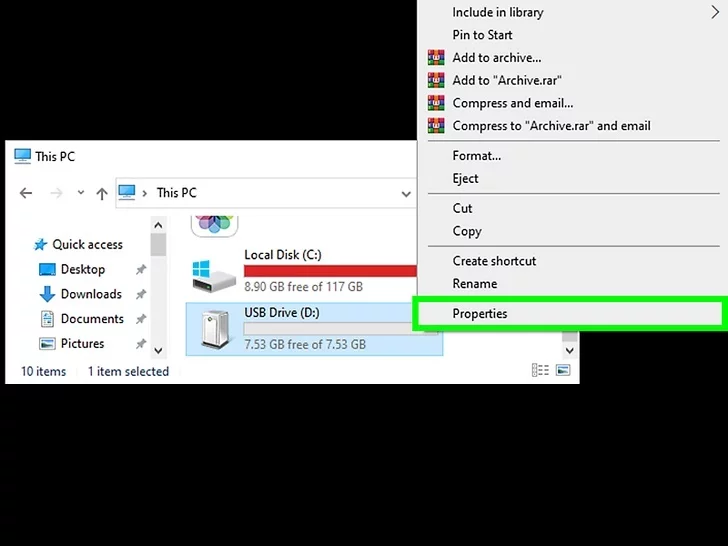
4. Click Properties. It’s at the bottom of the menu that appears when you right-click the drive.
5. Click the Tools tab. This option is at the top of the Properties window.
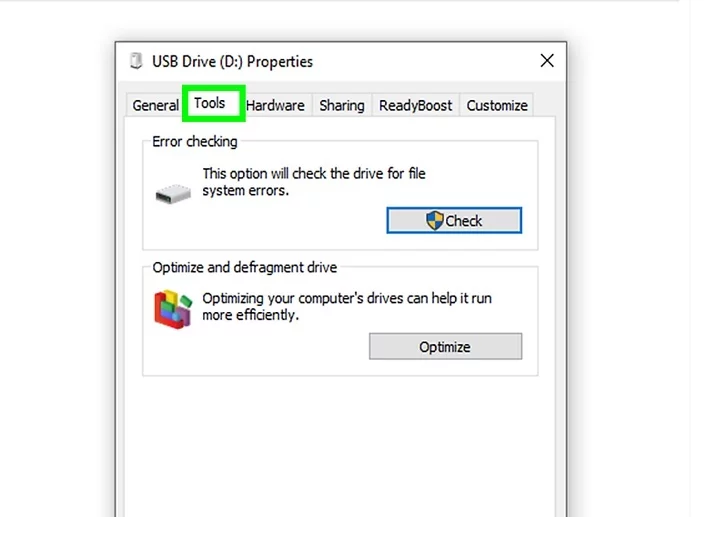
6. Click Check. You’ll see this button at the top of the Tools tab in the Error Checking section.

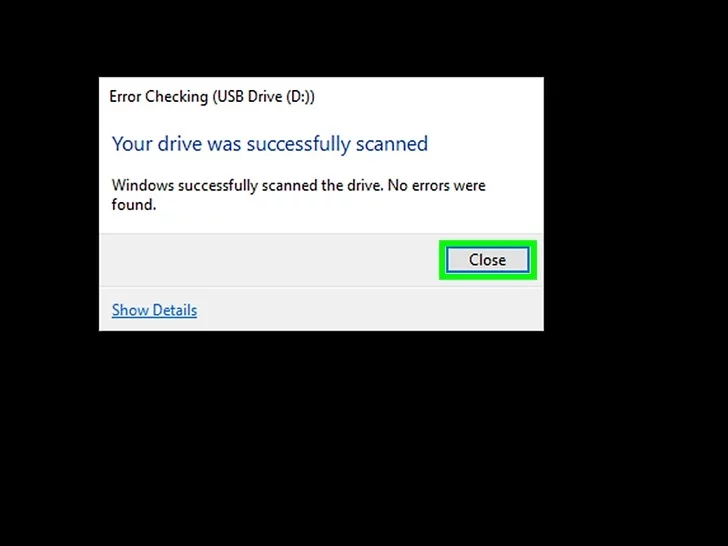
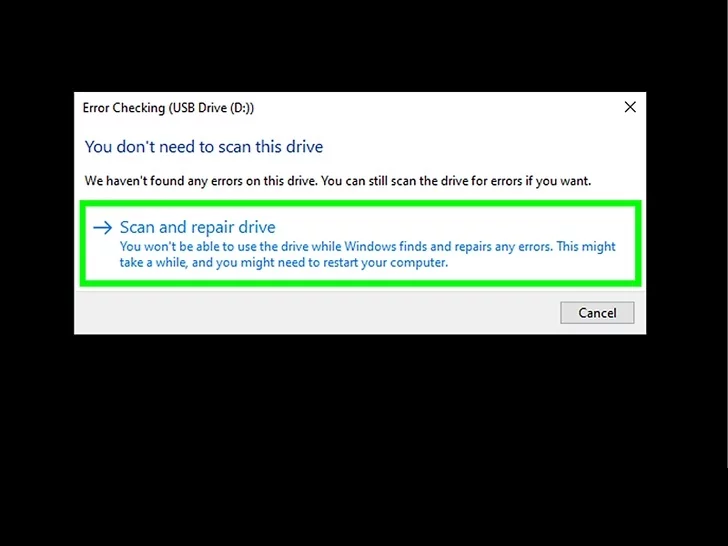
7.Wait for Windows to repair your drive. During the repair process, you may also need to follow some on-screen instructions.
For example, you may need to confirm that you want to repair the drive by clicking Scan and Repair.
8. Click Close when prompted. If the problem with your flash drive was driver or software based, it should now work.